Python Preferred Practice 2: Dependency Management
Dependency management is one of those topics that feels like a chore when you're first
learning Python. If your script runs, who cares what version of polars you're using,
right? But as you start building more complex applications, collaborating with others,
or deploying your work, you'll quickly realize that disciplined dependency management is
the bedrock of reliable and professional software.
What is Dependency Management?
Dependency management encompasses the approaches taken to manage the dependencies of a
piece of software. If you are writing a Python script, there are far more dependencies
than you might think. The most obvious dependencies are the Python packages that you
import into your script. When you pip install something, you are actually fetching a
specific version of that something. Further, there are also dependencies on the version
of Python that you are using (like I discussed in my last PPP), and on the operating
system that you are running on. You may not know it, but there are innumerable things
happening beneath the surface that often just work for us. It is actually amazing when
you think about it.
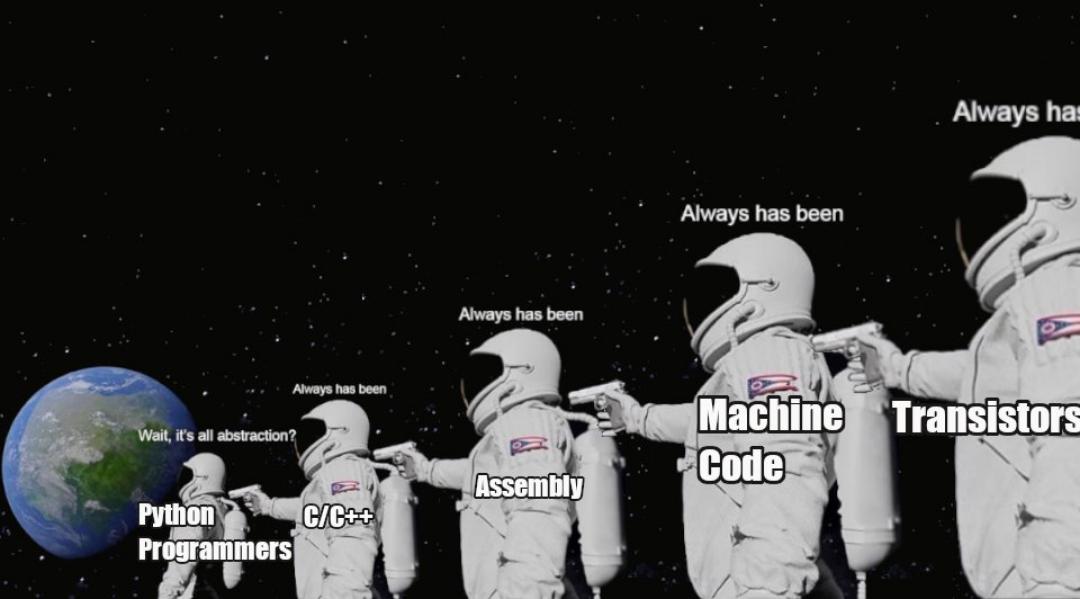
Those packages you use? They depend on packages too. And those packages depend on other packages. Sometimes, they depend on other operating systems. Some packages are written to run purely on Linux, other, on Windows. Some depend on certain hardware, like RAPIDS which requires an NVIDIA graphics card. I mean, your actual computer depends on the voltage of the electricity that is supplied to it. It's all dependencies. It always has been.
So where do we start? It seems a bit overwhelming.
Well. A good place to focus is just on your software, and what it needs. There are two things I am going to focus on in this PPP:
- Ring-fencing your dependencies, and
- Defining your dependencies.
Ring Fencing Your Dependencies: Or how I learned to stop worrying and love virtual environments
You may have heard of virtual environments and that you should be using them. But what are they? And why should you use them?
Let's ignore the name for now. Let's focus on a problem and see how virtual environments are the solution.
You are writing a script. But, you need a specific version of a package. Turns out, the package you were using removed a feature, or changed how it worked, significantly. You need to use the old version. However, you also need to use the new version for another script. What do you do?
You can completely change your code to use the new version only. But, thats not realistic. In practice, so many things are changing that you simply can't keep re-writing all your code all the time every time a package updates. Ain't nobody got time for that.
So ideally, you could have both versions installed, and specify which version to use. Starting to sound familiar? This is the same problem we have with Python versions. Ideally, you want a way to manage different versions of this package, and specify which version to use for which script.
Virtual environments solve this problem, and a whole host of other problems. Essentially, what they do is create a specific environment within which you will operate. This environment is completely separate from any other environment you may have. It has its own Python version, its own packages, its own everything. This is a completely separate environment. It is like a little bubble that you can do whatever you want in, and it won't affect anything outside of that bubble. (The very astute of you may disagree, but in 99.9% of cases this is true.)
For every new project, you ideally want to give it its own space where it can live its own life, unhindered. This is what virtual environments do. They ring-fence your dependencies. Let's see how it works, in detail.
Enter: uv (again)
There are so many ways to create and manage virtual environments. You might come across:
venv, virtualenv, poetry, pip-env, conda, virtualenvwrapper, and many more. I am going
to focus on uv, because it is the tool I use, and it is the one I prefer. Why do I
prefer it? Simplicity.
When you want a virtual environment, there are two-point-five things you need to do:
- install
uvif you don't already have it (see here: uv installation instructions) - create it
- activate it
That's it. That's all you need to do. And uv venv does just that. It creates a virtual
environment, and it activates it. It is that simple. Let's see how it works. You'd
create a project in a folder, and then create a virtual environment in that folder and
activate it. You can do this by running the following commands in your command line or
terminal:
# create a new project folder and navigate into it
mkdir my_project
cd my_project
# create a new virtual environment
uv venv
# activate the virtual environment
source .venv/bin/activate # on windows: .venv\Scripts\activateThat's it, now you are in your virtual environment. Anything you do, as long as the environment is activated, will happen within this virtual environment. Where is this virtual environment? It is in the folder where you created it.
If you look in that folder, there will be a .venv folder, and in that folder will be
your Python version, and all the packages you install. It all happens in this folder.
Its all ring-fenced here.
Want a new package? Make sure your environments is activated and pip install polars.
Now, this version of polars will exist only in this folder for this environment.
Now, notice earlier I said two-point-five things to do? Yea, you need to install uv
first. But, you only need to do that once. So, it is really just two things to do once
you have it installed.
Okay, we have ring-fenced our environment. Where is the dependency management?
Okay, yea, no dependency management yet. You got me! However, dependency management needs a strictly controlled environment before its useful. So, now that we have that, we can enforce our dependencies.
We need a way to tell users of our software what versions we depend on. A natural way to
do this is to create a file that lists all the packages we depend on, and their
versions. This file would be your "dependency manifest", or "project configuration
file". In Python, this was typically the requirements.txt file. In this file, you
simply list your projects requirements. A nice easy way has always been to say pip freeze > requirements.txt. What this does is write aaaallll your installed packages
and their versions to the requirements.txt file.
It feels weird to me to install what I need, and then define a file to say what I need, based on what I needed. Right? Weird. Also, sometimes there might be conflicts. If I just install what I need and then say what I need, I have not checked what my dependencies need. And there is no way I am going through all the dependencies of my dependencies to check their dependencies. That's just silly.
Rather, I would want to define upfront what I need (and change it as I go along) and have my dependency manifest automatically created based on my specifications, and to check all my dependencies' dependencies.
Once again, uv comes to the rescue. It does exactly this.
pyproject.toml: our project configuration file
A pyproject.toml file is a configuration file for Python projects. It is a standard
way to specify project metadata, dependencies, and build settings. It is a simple text
file that is easy to read and write. You can create one in your project folder with uv
by running:
uv initThis command actually creates a few files:
pyproject.toml: our project configuration filemain.py: a sample Python scriptREADME.md: a sample README file.gitignore: a sample git ignore file.python-version: the Python version for this project.git/: a git repository for this project
Let's ignore the other files for now (you may recognise the .python-version file from
my last PPP) and focus on the pyproject.toml file. The pyproject.toml file is where
we will define our dependencies. Open it up, and you should see the following:
[project]
name = "my_project"
version = "0.1.0"
description = "Add your description here"
readme = "README.md"
requires-python = ">=3.13"
dependencies = []These should all be self-explanatory. The important part is the dependencies section.
This is where we will define our dependencies. For example, if we want to use polars
and numpy, we would add them to the dependencies section. uv has a command to do
this for us. We can run:
uv add polars numpyThe uv add command adds the specified packages to the dependencies section of the
pyproject.toml file. It also installs the packages in our virtual environment. In
fact, uv add automatically creates a virtual environment for us if we don't already
have one. And, if we run our Python code through uv, it automatically activates the
virtual environment for us too. So we don't even have to worry about making them anymore
at all!
Our pyproject.toml file now looks like this:
[project]
name = "my-project"
version = "0.1.0"
description = "Add your description here"
readme = "README.md"
requires-python = ">=3.13"
dependencies = [
"numpy>=2.3.4",
"polars>=1.35.2",
]Now, let's say we didn't want the latest version of polars, but rather a version
before version 1.0. We can specify that too:
uv add "polars<1"Now, our pyproject.toml file looks like this:
[project]
name = "my-project"
version = "0.1.0"
description = "Add your description here"
readme = "README.md"
requires-python = ">=3.13"
dependencies = [
"numpy>=2.3.4",
"polars<1",
]And that's it! We have defined our dependencies in a simple and easy way. When someone
else wants to use our project, they can simply run uv sync to sync their virtual
environment with our pyproject.toml file. This will install all the packages we need
in their virtual environment.
You can find out more about the uv add command
here.
Closing thoughts
What I have shown in this PPP, is my preferred way to set up a Python project with dependency management. There are many other ways to do it, and many other tools to use. But, this is the way I do it, and I find it to be the simplest and most effective way to manage my Python projects.
I hope this has been valuable. I look forward to writing up the next one.
Changelog
- 16 November 2025: Changed process from using `virtualenv`, `pip-tools`, and `pip-compile` to using `uv`